Installation Instructions Welcome to the installer resources page. The following guide illustrates how to install a BuzzBud Cloud Callbox, which is designed to use in a residential setting. The OwnerGo website can be used in both apartment rental and condo community settings. This callbox is designed for both indoor and outdoor applications.
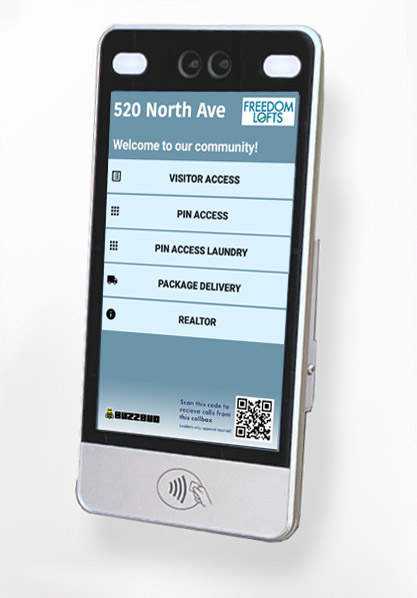
OwnerGo BuzzBud 8 inch
Installation Requirements
Internet Connection: 2.4 GHz WIFI connection -or- 10/100 CAT5 Ethernet (recommended)
Power: 12V/2A (2.1mm x 5.5mm Female DC Connector)
Tools Needed
RJ45 Crimp Tool (if connecting to Ethernet)
Drills and anchors for attaching mounting bracket to wall
Philips screwdriver (both PH1 and PH2 bits)
Wire Nut Connectors recommended for connecting wiring
Contents of Box
OwnerGo Buzzbud Callbox screen
12V/2A AC Adapter (Input: 100-240V 50/60Hz 0.8 A) (2.1mm x 5.5mm Female DC Connector) with 4ft wire
Torx Pin-in-Star T10 security wrench (included)
Low duty mounting bracket (recommended for indoor applications)
mounting hardware for drywall applications
Specifications
Model: OwnerGo Buzzbud 8 inch
Operating System: Android 7.1.2
Memory: 4GB DDR RAM, 16GB eMMC for storage of camera footage (not all space may be used by images)
Cameras: Color/IR 2MP HD (software does not store images in full resolution to save disk space)
Ethernet: 10/100 CAT5 (you must wire RJ45 connector using RJ45 Crimp Tool)
Internal RFID Reader: 13.56Mhz cards (ISO14443 Type A/B, ISO18092 compliant)
WIFI: 2.4 GHz
Ports: DC Power, Ethernet, Wiegand input/output, Relay connection, USB Type A
Certification: CE
Waterproof rating: IP66
Power: 12V/2A DC. The callbox does not support POE.
Screw Specifications
Rear screws: Phillips Oval M3x0.5 6MM (PH2 or PH1 screwdriver bit)
Security screws: Torx (pin in star) M3-0.5 6MM (T10 screwdriver bit)
Installation Video
VIDEO
Choosing the right installation location
For many buildings, especially in situations where you are replacing an existing callbox, it will likely make sense to install the Buzzbud in the same location as the old callbox, in order to utilize existing wiring or mounting surfaces. In situations where you can choose a location for the callbox, please consider the following:
Consider evening or morning sunlight in the installation location. If sunlight is going to point directly into the camera, it may make the visitor's face hard to see
Overhead sunlight, in the heat of the day, may heat up the callbox and make it hot, reducing the life of the callbox. Consider installing a sun shield over the callbox to shield it from direct overhead sunlight, if you think that would be a factor.
It is generally better to install the callbox on the doorknob side of the door or gate, especially if the door or gate opens outward.
If possible, install the callbox at least 6 inches from the door jam to avoid people bumping into the callbox as they enter the building. You do not want residents using the callbox to prop up boxes or groceries as they enter the building.
It may be temping to use the callbox as a 'step' if someone were to scale the wall, if it is possible to climb over a wall or gate. Consider using the flush mount option or shield to prevent the callbox to be used as a step
If possible, point the camera in the direction of people approaching the door. If people are walking towards the camera (versus past the camera), the images will show the visitors face better, and the motion detection will have more opportunity to capture the visitors faces.
Avoid areas with constantly moving objects, such as flags or slow moving traffic from a road. That may cause the motion detection to pick up objects that are not people
It is best that any nighttime lighting is pointed away from the camera instead of towards the camera.
For ADA compliance, install the callbox no more than 48 inches from the ground.
Getting Started
Select Your Mount
Low Profile Rugged Flush Pedestal PedestalPro Housing The Low Profile mount is the standard mount included with every BuzzBud callbox. This mount should be used in indoor installations or outdoor locations with low humidity. Use the buttons above to select another option if you purchased an alternate mount for the callbox.
1. 2. Be sure to install bracket with correct side facing wall (larger circular holes facing you).
3 exposed tips of the wires labeled 'WG' to prevent false signals being sent to callbox if the exposed wire is grounded inside wall. Do not cut off entire wire as you may want to add a reader in the future to this callbox.
4.
Ethernet CAT 5 wiring to Callbox LAN connection
You must use a twisted pair Ethernet Cat 5 or Cat 6 cable, which cannot be longer than 300 feet between the callbox and the Ethernet router or Ethernet switch. If the router is over 300 feet away (by cable length), use an Ethernet switch or Ethernet repeater to break up the distance, so the callbox is not more than 300 feet away from a piece of powered network equipment.
Callbox LAN Wire PIN T568B RJ45 Ethernet Cable Orange/White TX+ 1 Orange/White Orange TX- 2 Orange Green/White RX+ 3 Green/White - 4 Blue - 5 Blue/White Green RX- 6 Green - 7 Brown/White - 8 Brown
5. (available at http://ownergo.com/install) . The wiring will be different depending on the maglock or door strike you use with your gate or door.
Relay And Door Reader Wiring Guides
6. under 50 feet, use 18/2 AWG
50 - 100 feet, use 16/2 AWG
100-200 feet, use 14/2 AWG
200-300 feet, use 12/2 AWG
7. 8.a 8.b 9.
Installing Callbox Software
Follow these instructions if the OwnerGo callbox software has not already been installed in your callbox
Slide your finger from the bottom upwards on the Android home screen. Open the 'Settings' app. You may watch the Callbox Software Installation video at http://ownergo.com/install for more visual instruction on these steps.
If you want to connect the tablet to the Internet with Wifi, select the 'Wifi' option at the top. Tap the selector at the top to 'turn on' Wifi if it is off. You should then see the available networks. Select the network you want to connect to, and enter the WIFI password. It should remember this network once you type it in.
Use the back button to return to the home screen.
Select the Google Chrome icon at the bottom right.
Enter the address ownergo.com/install
Click the link 'Install OwnerGo Callbox App'
Tap 'Continue' and then 'Allow'. Select 'OK' then 'Open'.
Tap the 'Install' button.
Tap 'Open'.
It will prompt you to pick the home app. Select 'OwnerGoCallbox' and then 'Always'.
It is recommended restarting the callbox after you finish configuring it to ensure the callbox automatically runs the OwnerGo Callbox app upon restarting. The Callbox will automatically restart each morning around 3:30AM.
Setting Up Callbox App For Community
Follow these instructions to configure the Callbox App to point to a community on OwnerGo
The screen should prompt you to enter a code. If you do not see a code entering screen, tap the upper left hand corner to show the command screen
Enter the code 'BUZZSETUP' then 'Open'.
It may ask you whether to enable location services. Select YES
From the Setup menu, select 'Change OwnerGo Callbox'.
The screen will ask you whether the community is already setup in OwnerGo. If you are not sure, select 'Yes'.
Follow the on-screen instructions to finish setting up the callbox.
Other Helpful Functions
You can enter these codes from the command screen by tapping the upper left-hand corner of the home screen on the callbox
BUZZWIFI Use this code to change WIFI settings. Turn off WIFI on the screen if you do not intend to use WIFI with this callbox
BUZZNETWORK Allows you to adjust set a static IP address, or setup a VPN network. OwnerGo does not provide support on advanced networking topics.
BUZZSOUND Adjust volume
UPGRADE Manually upgrade software to latest version, if a new software version is available. The callbox will automatically update itself just after midnight every day.
REFRESH Go to the OwnerGo server and retreive the latest community settings. There might be a delay when setting changes on OwnerGo reflect on your callbox, so entering this command will ensure the latest settings are reflected on your callbox.
BUZZDEBUG Enter this code to switch on and off the DEBUG mode, which will display more information about card reads on the touchscreen. This should be OFF when residents use the callbox.
BUZZDISPLAY Show display settings, which allow you to adjust the brightness settings. By default the screen brightness adjusts automatically depending on lighting conditions.
BUZZWIEGAND Monitor inbound wiegand signal if you have a wiegand compatible reader connected to the callbox. Connecting a reader allows the callbox to control card reads, or associate access card numbers with camera footage.
RELAYSCAN Scan network for remote relays (Read More Here )
RELAY1, RELAY2, RELAY3 Access the config screen for up to 3 detected remote relays (must run RELAYSCAN first to detect relays)
Please contact support if you have other configuration questions regarding the callbox.
Once the callbox is connected to OwnerGo, the rest of the setup process may be finished by the property manager from the OwnerGo Portal.